Set up CCM for GCP
Harness Cloud Cost Management (CCM) monitors the cloud costs of your GCP products, projects, SKUs, and location. As a first step, you need to connect Harness to your GCP account to get insights into your cloud infrastructure, and GCP services, Compute Engine, Cloud Storage, BigQuery, etc. CCM offers a wide range of features to track and control costs associated with your cloud resources.
After enabling CCM, it takes about 24 hours for the data to be available for viewing and analysis.
Before you begin
- Review Required permissions and roles to create an IAM role at the organization level
- Ensure that you have the following permissions to enable and configure the export of Google Cloud billing data to a BigQuery dataset:
- Billing Account Administrator role for the target Cloud Billing account
- BigQuery User role for the Cloud project that contains the BigQuery dataset that will be used to store the Cloud Billing data
Connect Harness CCM to Google Cloud Platform (GCP) Account
You can use Harness CCM features once your cloud account is connected to Harness CCM. This can be done via creating a cloud account connector for GCP.
Time periods in the GCP Cloud Billing report use the Pacific Time Zone (PST) and observe daylight saving time shifts. However, Harness CCM explorer uses the UTC time zone. You may notice some cloud cost differences between Harness CCM explorer and the GCP Cloud Billing report due to the time zone difference.
Create a new GCP connector in these 5 simple steps:
GCP Connector Setup Process Overview
Access the GCP Connector Setup
- Go to Account Settings > Integration for Cloud Cost.
- Select + New Cluster/Cloud Account.
- Select GCP.
OR
- Go to Account Settings > Connectors.
- Select New Connector.
- Select GCP-Cloud Cost under Cloud Costs.
Step 1: Overview
- In Overview, in Connector Name, enter a name that describes this account.
- In Specify Project ID, enter the project ID and select Continue. For more information on how to get a project ID, go to Create a BigQuery dataset.
- [Optional] Description: Enter a description for the connector.
- [Optional] Tags: Add tag to the connector.
Step 2: Setup Billing Export
Cloud Billing export to BigQuery enables you to export detailed Google Cloud billing data (such as usage and cost estimate data) automatically throughout the day to a BigQuery dataset that you specify.
Make sure that you have enabled Detailed Usage Cost on the Billing Export page on your GCP console. For more information, see Enable Cloud Billing export to the BigQuery dataset.
-
In GCP Billing Export, select Launch GCP console.
-
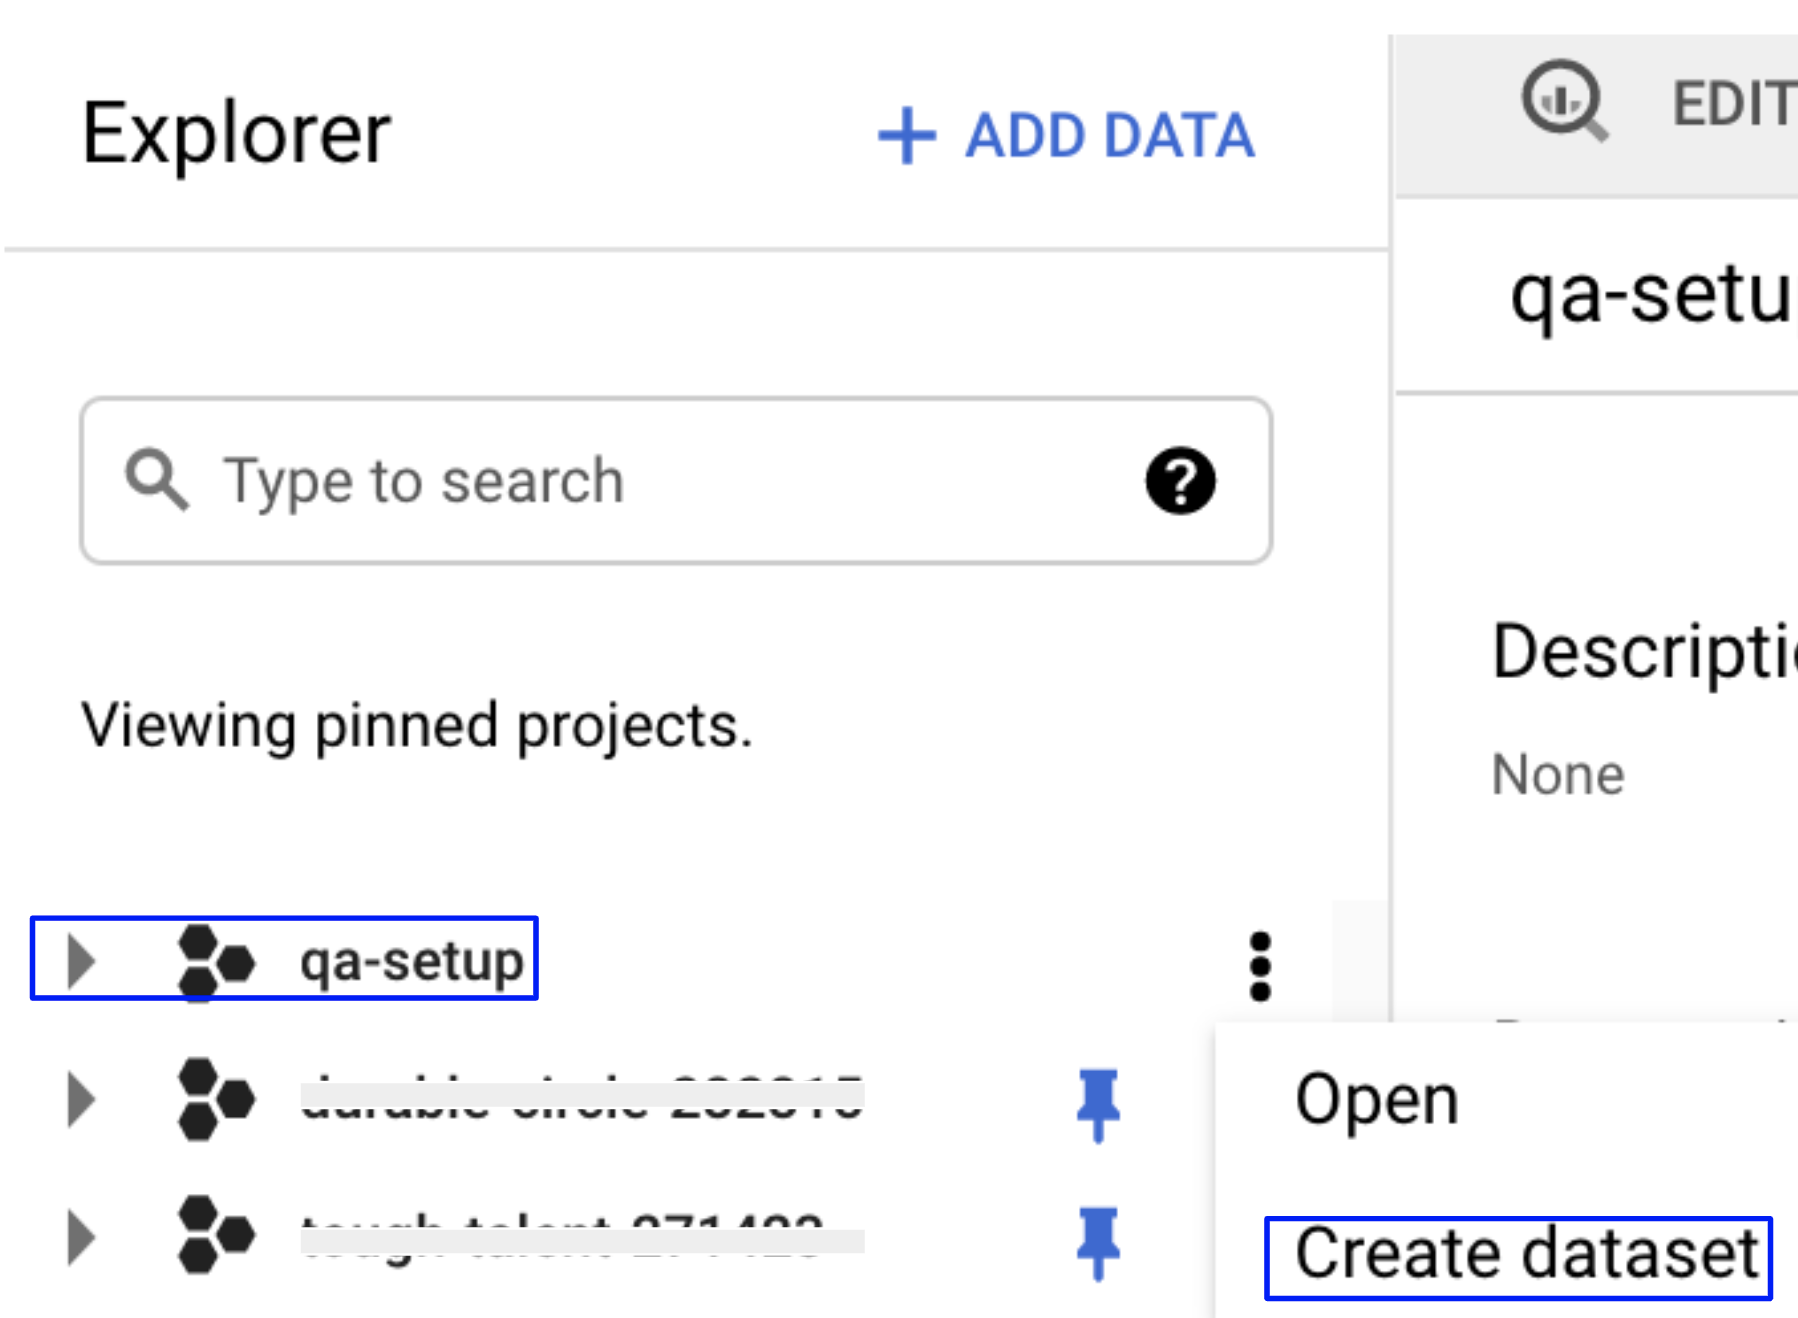
In the GCP Explorer window, in the pinned projects section, select your project ID to open the project. If you see an overflow menu (:) next to your project ID, select the menu and select Open.
-
Select Create dataset. For more information, go to Create a BigQuery dataset.
-
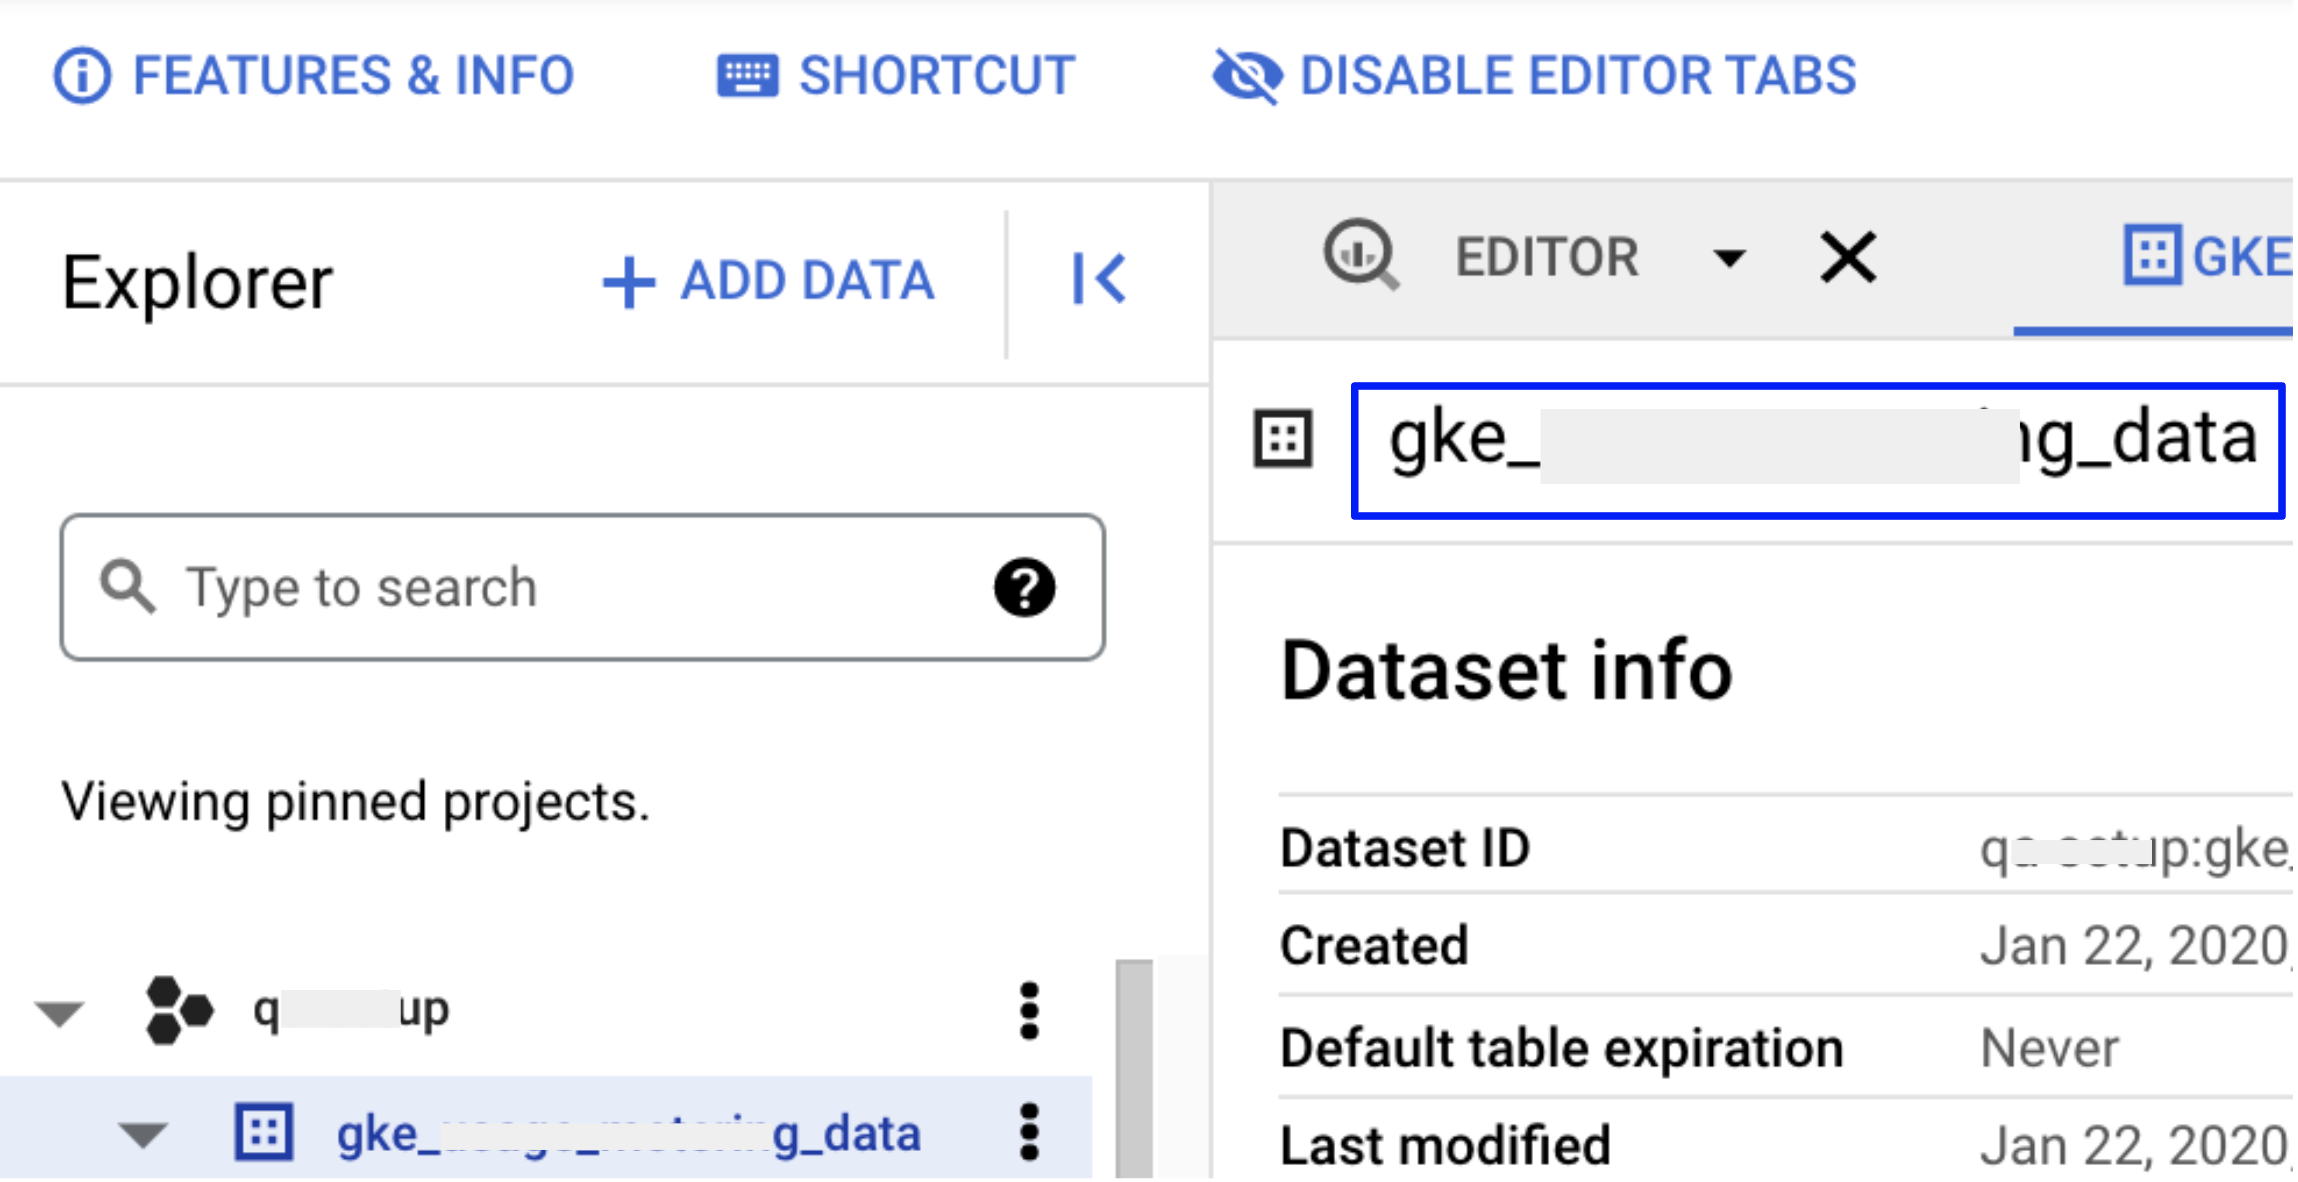
Enter a Dataset Name. You need to enter Dataset Name in Harness.
-
Select a Data location.
-
Set the Default table expiration to Never.
-
Set the Encryption option to Google-managed key.
-
To save, select CREATE DATASET.
-
Enter the Dataset Name in Harness.
-
Next, you need to enter the table name in Harness. From the GCP console, copy the table name where the billing export is available. In your BigQuery dataset, the table is named
gcp_billing_export_v1_*. -
Once the billing account is selected, open the navigation menu>Billing export>BigQuery export. In BigQuery Export section, user needs to setup "Detailed usage cost". When setting up your dataset, it is recommended to choose the United States (US) as the dataset location.
-
From the Project list, choose the project that contains your BigQuery dataset. You’ll be requested to establish a BigQuery dataset if you don’t already have one.
-
To create a dataset, if you don’t have one
- In the Google Cloud Console, go to the Google BigQuery Page.
- In the Explorer Panel, choose the Project for which you wish to build a dataset.
- Select +Create Dataset from the drop-down menu.
- Certain fields, such as Dataset ID, data location, and data expiry, will be required. You will be able to perform billing exports after you have your dataset ready.

- Enter the Table Name in Harness.
- Select Continue.
⚠️ GCP Billing Export Table Limitations and CMEK Restrictions When setting up a connector for GCP Billing Export, keep the following limitations and guidelines in mind:
- GCP does not support copying data across regions if the source table uses CMEK.
- GCP also does not allow copying data from Materialized Views.
- If your organization enforces CMEK policies, consider creating a new dataset without CMEK enabled specifically for the integration.
- It is recommended to create the dataset in the US region, as it offers the most compatibility with GCP billing export operations.
- Use datasets with default (Google-managed) encryption when configuring the connector.
Step 3: Choose Requirements
Select the Cloud Cost Management features that you would like to use on your GCP account.
| Features | Capabilities |
|---|---|
| Cost Visibility (Required) | This feature is available by default. Make sure you have set up the GCP Billing Export. Provides the following capabilities:
|
| Resource Inventory Management | This feature provides visibility into your GCE VMs and unused disks and snapshots. The insights provided by inventory management can be used by Finance teams to understand resource utilization across the board. |
| Optimization using AutoStopping rules | This feature allows you to enable Intelligent Cloud AutoStopping for your GCP cloud resources. If selected, you can select granular permissions in the next step |
| Cloud Governance (Optional) | This feature allows you to optimize your cloud spend and avoid unnecessary costs by rightsizing resources and decommissioning unused instances. For more information, see Asset governance.
|
Step 4: Authentication (Conditional)

If you have selected Optimization by AutoStopping or Cloud Governance, in previous step, you can set up Authentication. If not selected, this step will not be prompted.
You can enable authentication for your GCP account via
- Service Account with Custom Role: Created with custom permissions
- OIDC Authentication: Federated access with no stored credentials
OIDC Authentication
This feature is behind a Feature Flag CCM_ENABLE_OIDC_AUTH_GCP. Contact Harness Support to enable it.
OIDC authentication allows secure access your billing data and perform cost optimization without storing credentials.
To connect to GCP with OIDC, you must configure an OIDC identity provider in GCP and connect the service account with relevant permissions that Harness will use to operate in GCP. Use the following Harness OIDC provider endpoint and OIDC audience settings to create your OIDC identity provider.
-
Harness OIDC Issuer provider endpoint:
https://app.harness.io/ng/api/oidc/account/<YOUR_ACCOUNT_ID>. See below for more details about the Issuer URL format, depending on the environment cluster for your Harness Account. -
OIDC audience:
https://iam.googleapis.com/projects/<GCP_PROJECT_NUMBER>/locations/global/workloadIdentityPools/<POOL_ID>/providers/<WORKLOAD_PROVIDER_ID>
Issuer URL:
The Issuer Format will need to be modified depending on the environment cluster in which your account resides. In Account Settings -> Account Details, you can see the Harness Cluster that your account resides in.
The Issuer URL format should follow https://<HOSTNAME>/ng/api/oidc/account/<YOUR_HARNESS_ACCOUNT_ID>.
The hostname should be as follows, even if a Vanity URL is set up for an account.
| Cluster | HostName |
|---|---|
| Prod1/Prod2 | app.harness.io |
| Prod3 | app3.harness.io |
| Prod0/Prod4 | accounts.harness.io |
| EU clusters | accounts.eu.harness.io |
Follow the steps on the Authentication page to complete OIDC authentication:
-
Configure the federation settings and service account in your GCP console. Read more about it: Workload Identity Federation
-
Enter the following inputs from your GCP configuration:
- Workload Pool ID: This identifies the workload pool created in GCP, and it is the Pool ID value. To get the Workload Pool ID, go to Manage workload identity pools.
- Provider ID This identifies the OIDC provider configured in GCP, and it is the Provider ID value. To get the Provider ID, go to Manage workload identity pool providers.
- Project Number: The project number of the GCP project that is used to create the workload identity federation. To get the Project number, go to Creating and managing projects.
- Service Account Email: This is the service account that was linked to the workload identity pool in the last step.
If AutoStopping Granular Rules are selected, you will be prompted to generate commands. Click on Generate commands for step 3 and run the commands listed on screen to create and assign the custom role with permissions for your selected features.
Step 5: Grant Permissions
Yo u can see all the steps you need to do and grant relevant permissions. Follow the instructions listed on screen to grant permissions.
Step 6: Connection Test
The connection is validated and verified in this step. After successfully testing the connection, select Finish.
Your connector is now listed in the Connectors.
Individual Feature Permissions
Governance Permissions
To configure permissions for Cloud Governance features:
- Navigate to IAM & Admin in the GCP console.
- If authentication is done via service account:
- Search for your service account in the principals list
- Click Edit Principal
- Add the Viewer role (
roles/viewer) from the Basic category - For automated actions, grant additional permissions as required by your governance policies
- Click Save to apply the changes.
AutoStopping Permissions
To add AutoStopping permissions:
- Navigate to the IAM & Admin page on the GCP console.
- Click IAM on the right pane.
- Click Add in the PERMISSION tab.
- In the Add Principals to [Project name] window, enter the service principal.
- Select the required roles and click Save.
When a connector is created, a service account is created in Harness' GCP project that is unique for each customer. This service account is created only once per customer. You need to assign two roles to this service account in the GCP project that they are connecting to Harness CCM:
-
Compute Admin - Assign this role to Harness' service account. This allows Harness CCM to be able to perform AutoStopping actions such as starting and stopping of VMs and Instance groups. Also, GCP AutoStopping involves the usage of a custom VM with configurations as per your preference (instance type configuration). This requires access to create and launch a VM in which a custom load balancer for AutoStopping is installed.
-
Secret Manager Secret Accessor - Assign this role if you intend to use TLS/HTTPS in the routing configurations of the AutoStopping Rule. You need to upload the certificate's private key and the public certificate as secrets in GCP. Harness needs access to these secrets to be able to configure the custom load balancer. This role provides access to only the particular versions of the secrets, provided the complete path is entered during the creation of the custom load balancer. It does not let Harness view or list all the secrets in your GCP project. You can also add additional protection in the GCP on your end to provide conditional access to secrets as necessary. For example, provide access to Harness' service account to versions of only those secrets with a naming convention like "Harness-". :::
Granular Permissions for AutoStopping

Compute Engine Virtual Machines
Schedules only
// List VMs
compute.instances.list

// Tag VM
compute.instances.setLabels

// Get region information to list zones
compute.regions.get

// List regions
compute.regions.list

// Required while waiting to complete VM operations, for example stop operation
compute.zoneOperations.get

// Stop VM
compute.instances.stop

// Start VM
compute.instances.start
with AutoStopping Proxy
// List networks
compute.networks.list

// List machine types
compute.machineTypes.list

// List subnets
compute.subnetworks.list

// List security groups
compute.firewalls.list

// Create address
compute.addresses.create

// Get address
compute.addresses.get

// create disk
compute.disks.create

// Use sub network
compute.subnetworks.use

// Create proxy VM
compute.instances.create

// use static IP
compute.subnetworks.useExternalIp

// Use address
compute.addresses.use

// Set VM metadata
compute.instances.setMetadata

// Set tags
compute.instances.setTags

// Delete address
compute.addresses.delete

// Delete proxy VM
compute.instances.delete
Instance Groups
Schedules only
// Get region information to list zones
compute.regions.get

// List regions
compute.regions.list

// list instance groups
compute.instanceGroups.list

// list managed instance groups
compute.instanceGroupManagers.list

// get instance groups details
compute.instanceGroups.get

// Get instances in instance groups
compute.instances.get

// List autoscalers
compute.autoscalers.list

// Get autoscaler details
compute.autoscalers.get

// For updating autoscaler configurations. This is needed during warm up and cool down
compute.autoscalers.update

// List VMS in instance group
compute.instances.list

// Deleting VMs from managed instance groups during cool down
compute.instances.delete

// Get status of operations
compute.globalOperations.get

// Get status of operations
compute.regionOperations.get

// Get status of operations
compute.zoneOperations.get
with AutoStopping Proxy
// List networks
compute.networks.list

// List machine types
compute.machineTypes.list

// List subnets
compute.subnetworks.list

// List security groups
compute.firewalls.list

// Create address
compute.addresses.create

// Get address
compute.addresses.get

// create disk
compute.disks.create

// Use sub network
compute.subnetworks.use

// Create proxy VM
compute.instances.create

// use static IP
compute.subnetworks.useExternalIp

// Use address
compute.addresses.use

// Set VM metadata
compute.instances.setMetadata

// Set tags
compute.instances.setTags

// Delete address
compute.addresses.delete

// Delete proxy VM
compute.instances.delete